Install Pleasanter on Red Hat Enterprise Linux 9.7/10.1 Using the Installer
Overview
This procedure explains how to set up Pleasanter's operating environment using an "Installer". Installation is also possible using the traditional manual procedure for module placement and parameter configuration. Please refer to the following for manual installation procedures.
Install Pleasanter on Red Hat Enterprise Linux 9.7/10.1
| Target | Content |
|---|---|
| OS | Red Hat Enterprise Linux 9.7/10.1 |
| DB | PostgreSQL 18 / MySQL 8.4 |
| Web Server | nginx 1.20.1 |
| Platform | .NET 10.0.100 |
| Pleasanter | Pleasanter 1.5.0.0 and later |
Cautions
- MySQL can be used from ver1.4.9.0 onwards. Pleasanter versions prior to ver1.4.9.0 do not support MySQL.
- When separating the web server and DB server in a MySQL configuration, please refer to "Configure MySQL to be used in a configuration where the web server and DB server" or "Configure the Web Server and DB Server to Use MySQL Separately".
Limitations
Installation using the "Installer" is applicable for Ver1.5.0.0 and later. When installing Ver1.4.23.3 or earlier, please refer to the manual installation procedures.
Install Pleasanter on Red Hat Enterprise Linux 9.7/10.1
Prerequisites
- OS setup procedures are not described. It is assumed that the OS has already been set up.
- Please check here for details about the operating environment and specifications.
FAQ: I want to know the operating environment and recommended specifications - Please decide in advance which user will start Pleasanter.
mentioned in the procedure refers to this user. - This procedure explains the case where .NET is installed in /usr/local/bin. If you need to install .NET in a different directory (for example, when multiple versions of .NET are required in the same environment), please change the directory specified in ExecStart when executing CodeDefiner and creating the Pleasanter service script to match your installation destination.
Procedure
The setup procedure is as follows:
1. .NET setup
1. Database setup:
Perform the following setup for either PostgreSQL or MySQL.
※The order below may not match the actual implementation order.
1. DB installation
1. DB administrator privilege user configuration
1. DB log output configuration
1. DB service configuration and automatic startup enablement
1. Configuration to allow external access to the DB (if applicable)
1. Installer installation
1. Pleasanter setup
1. Installer execution
1. Pleasanter startup verification
1. Pleasanter service script creation
1. Service registration and service startup
1. Reverse proxy (nginx) setup
1. SELinux configuration change
1. nginx installation
1. Reverse proxy configuration
1. Http(80) access permission
1. Pleasanter operation verification
1. .NET Setup
Execute the following commands to install .NET.
sudo wget https://dot.net/v1/dotnet-install.sh -O dotnet-install.sh
sudo chmod +x ./dotnet-install.sh
sudo ./dotnet-install.sh -c 10.0 -i /usr/local/bin
dotnet --version
For details, please refer to Scripted install on the official page below:
https://learn.microsoft.com/en-us/dotnet/core/install/linux-scripted-manual#scripted-install
Also, there may be cases where errors related to specific files occur when executing the dotnet command. In such cases, please refer to the page below:
https://learn.microsoft.com/en-us/dotnet/core/install/linux-package-mixup?pivots=os-linux-redhat
2. Database Setup
Refer to either "PostgreSQL Setup" or "MySQL Setup" below to set up the database.
1. PostgreSQL Setup
The PostgreSQL setup procedure is as follows:
1. PostgreSQL Installation
Execute the following commands to install PostgreSQL.
sudo dnf install -y https://download.postgresql.org/pub/repos/yum/reporpms/EL-9-x86_64/pgdg-redhat-repo-latest.noarch.rpm
sudo dnf install -y postgresql18-server postgresql18-contrib
2. PostgreSQL Database Initialization
Execute the following command to initialize the database. ※ -A: Authentication method specification, -W: Option to display password input prompt
After execution, a password input prompt will be displayed, so enter a password. Please make a note of the password set here as it will be used in step 3.2.
3. PostgreSQL Log Output Configuration
Open /var/lib/pgsql/18/data/postgresql.conf and edit the following settings.
4. PostgreSQL Service Restart and Service Configuration
Execute the following commands to restart the PostgreSQL service and enable automatic service startup.
5. Configuration to Allow External DB Access (if applicable)
-
Uncomment the following two lines in /var/lib/pgsql/18/data/postgresql.conf and configure as shown below:
-
Add the following line to /var/lib/pgsql/18/data/pg_hba.conf. Specify the range of IP addresses that will be allowed access in the Address field.
-
After configuration, execute the following command to restart the PostgreSQL service.
2. MySQL Setup
The MySQL setup procedure is as follows:
1. MySQL Installation
-
Execute the following commands to install MySQL packages and server.
sudo dnf install -y https://dev.mysql.com/get/mysql84-community-release-el9-1.noarch.rpm
sudo dnf install mysql-community-server
The URL specified in the command is the same URL as specified in the official repository below:
https://dev.mysql.com/downloads/repo/yum/ -
Execute the command to display the service status.
-
Verify that "Active: inactive (dead)" is displayed, confirming the service is stopped.
2. MySQL Service Automatic Startup Enablement
-
Execute the following command to start the MySQL service.
-
Execute the following command to enable MySQL service automatic startup.
3. MySQL User Configuration
-
Add the following configuration under [mysqld] in /etc/my.cnf.
The configuration file path may differ depending on the OS or MySQL version.
-
Execute the following command to restart the MySQL service.
-
Execute the following command to log in to MySQL with the root account (without password specification).
-
Execute the following SQL to set a password for the MySQL root account.
flush privileges;
alter user 'root'@'localhost' identified by '<New password for MySQL root account※>';
※By default, the MySQL installed in this procedure requires a password of 8 characters or more, using uppercase, lowercase, numbers, and special characters.
-
Execute the following command to log out of MySQL from the root account.
-
Delete the description added under [mysqld] in /etc/my.cnf. Do not delete [mysqld] itself.
-
Execute the following command to restart the MySQL service.
-
Execute the following command to verify that you can log in to MySQL with the root account.
-
Execute the following command to log out of MySQL from the root account.
4. MySQL Log Output Configuration
MySQL has error log output enabled by default. If you do not change the default output destination, the following steps are not required.
-
Check the log file path written in log-error under [mysqld] in /etc/my.cnf.
The configuration file path may differ depending on the OS or MySQL version. -
If you want to change the error log output destination, after editing the my.cnf file, execute the following command to restart the MySQL service.
5. Configuration to Allow External DB Access (if applicable)
Follow the procedures in the following manuals to add MySQL users:
- Configure MySQL to be used in a configuration where the web server and DB server
- Configure the Web Server and DB Server to Use MySQL Separately
This is not required if the web server and DB server are not separated.
3. Installer Installation
Execute the following commands to install the installer. To install Pleasanter version 1.5.0.0 or later, please use the latest installer.
(If you are installing Pleasanter version 1.4.23.0 or earlier, please refer to here.)
dotnet tool install -g Implem.PleasanterSetup
echo 'export PATH="$PATH:~/.dotnet/tools"' >> ~/.bashrc
echo 'export DOTNET_ROOT=/usr/local/bin' >> ~/.bashrc
echo 'export PATH=$PATH:$DOTNET_ROOT' >> ~/.bashrc
source ~/.bashrc
If not connected to a network environment, please install using the following procedure:
(Click here to expand/collapse details)
- Execute the following command to create an arbitrary folder to place the .nupkg file.
※This procedure explains the case where /dotnet-tools is created.
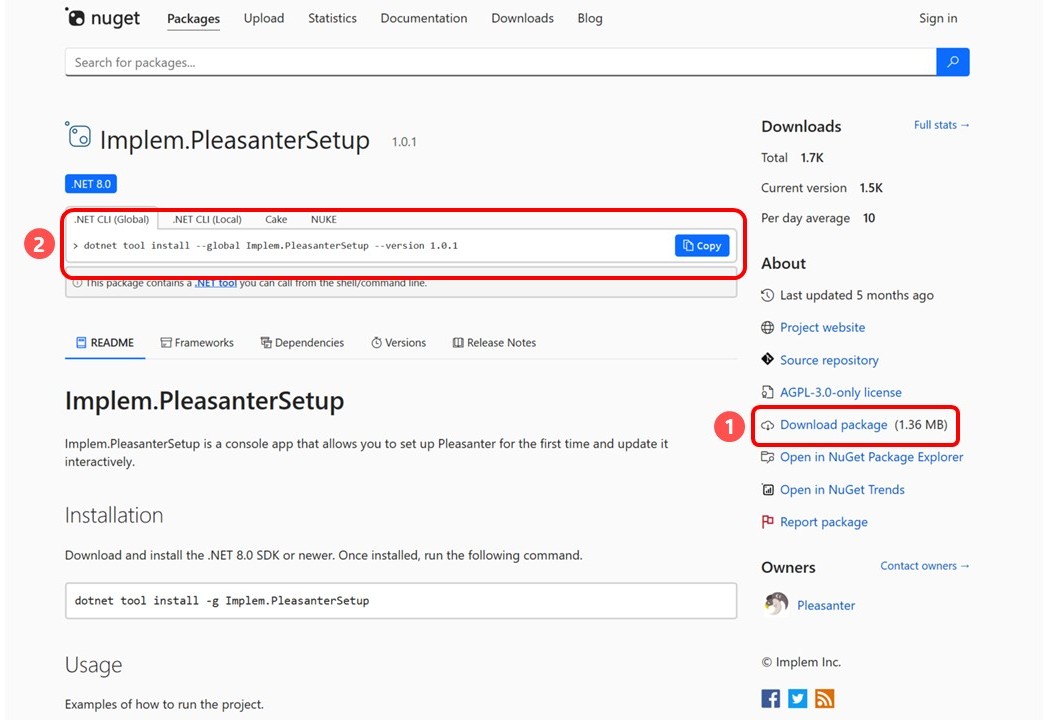
- Open the Nuget Gallery for Implem.PleasanterSetup from here and download the .nupkg file from ① "Download package" in the image.
- Place the .nupkg file downloaded in step 2 in /dotnet-tools.
- Copy the command from ② in the image.
-
Execute the following command:
Example: When Implem.PleasanterSetup Version is 1.0.1
4. Pleasanter Setup
1. Installer Execution
By using the installer, the latest version resources are automatically downloaded, and Service.json and Rds.json values are automatically configured based on the entered values.
Procedure When Using PostgreSQL
-
Execute the following command to run the installer.
If not connected to a network environment, please follow the procedure below
(Click here to expand/collapse details)
-
Download the latest version of Pleasanter from the Download Center and place it in "/web/".
-
Execute the following command:
Verify that the structure under the /web/ directory is as follows:
-
-
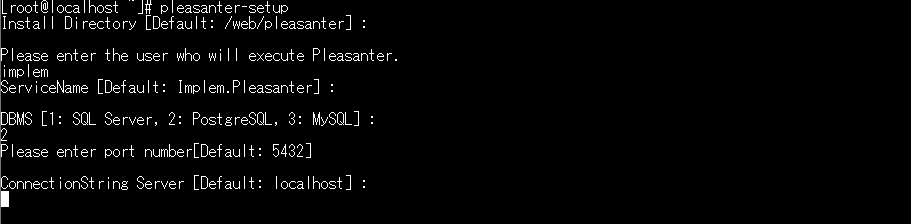
Enter the directory where Pleasanter will be installed.
If installing in "/web/pleasanter", press Enter key with blank input.

-
Enter
.

-
Enter the service name.
If "Implem.Pleasanter", press Enter key with blank input.

-
Enter the number corresponding to the DBMS to use.
Here, enter "2" and press Enter key.

-
Enter the port number to use.
If using the DBMS default port number, press Enter key with blank input.

-
Enter the value to set in Server of the connection string.
If "localhost", press Enter key with blank input.
-
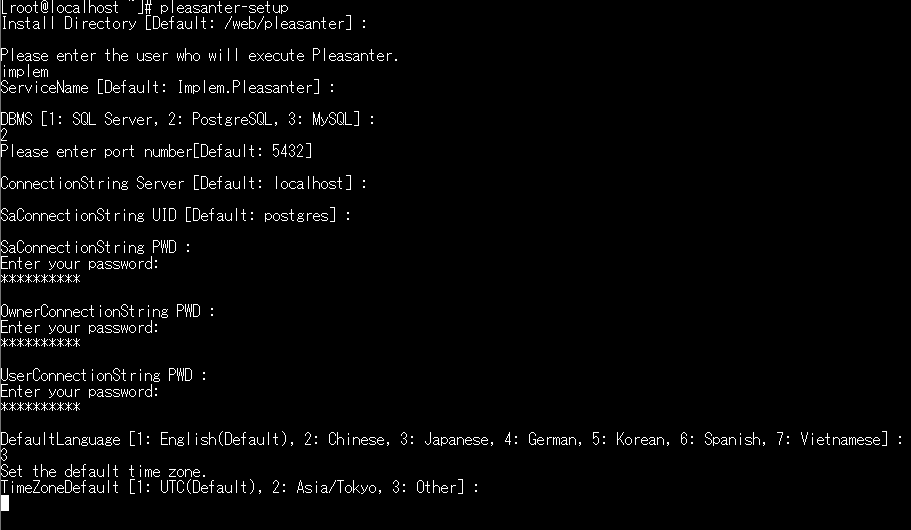
Enter the value to set in UID of SaConnectionString.
If "postgres", press Enter key with blank input.

-
Enter the value to set in PWD of SaConnectionString.
※Passwords are displayed masked.

-
Enter the value to set in PWD of OwnerConnectionString.
※Passwords are displayed masked.

-
Enter the value to set in PWD of UserConnectionString.
※Passwords are displayed masked.

-
Enter the "Default Language".
Enter the number corresponding to the language.

-
Enter the "Default Time Zone".
Enter the number corresponding to the time zone.
※If you enter "3", enter a time zone that can be used by the OS you are using.
-
A summary screen is displayed.
If the entered values are correct, enter y after "Shall I install Pleasanter with this content? Please enter 'y(yes)' or 'n(no)'. : " and press Enter to execute.
※Passwords are masked.

-
When "Type "y" (yes) if the license is correct, otherwise type "n" (no)." is displayed, enter y and execute.
When the following log is displayed, setup is complete.
-
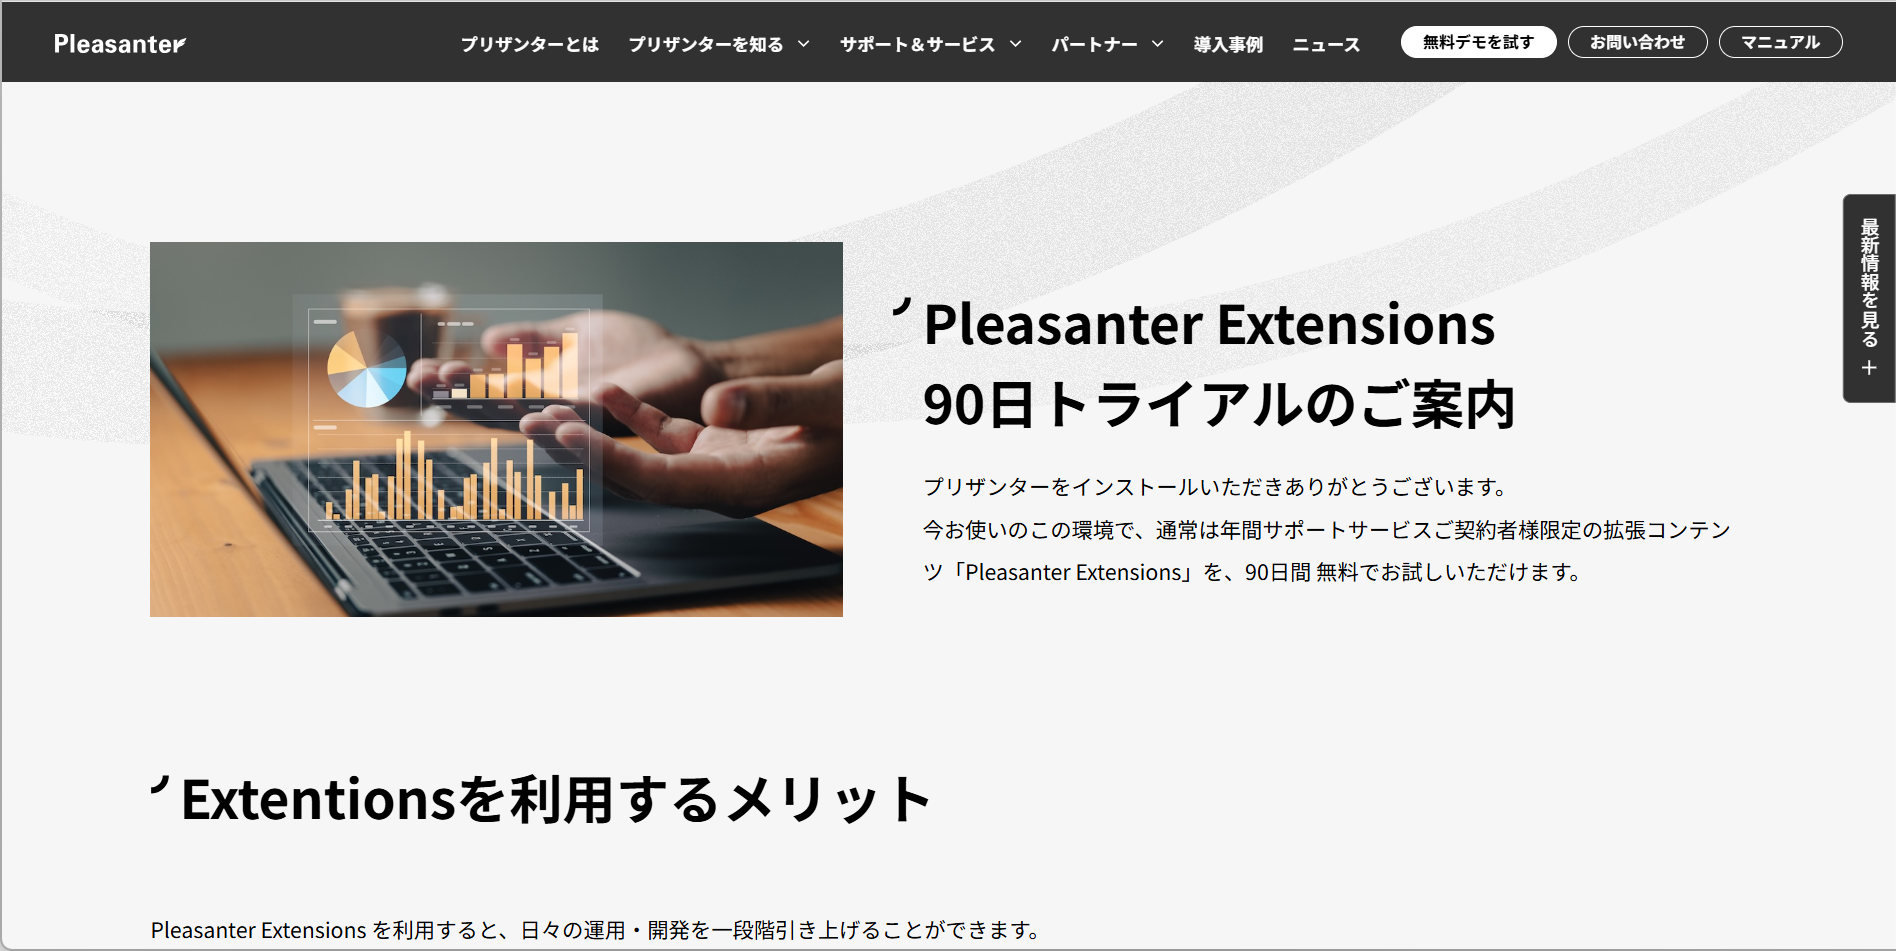
When setup is complete, a web browser will launch and display the Enterprise Edition trial information page.
Procedure When Using MySQL
-
Execute the following command to run the installer.
If not connected to a network environment, please follow the procedure below
(Click here to expand/collapse details)
-
Download the latest version of Pleasanter from the Download Center and place it in "/web/".
-
Execute the following command:
Verify that the structure under the /web/ directory is as follows:
-
-
Enter the directory where Pleasanter will be installed.
If installing in "/web/pleasanter", press Enter key with blank input.
-
Enter
. -
Enter the service name.
If "Implem.Pleasanter", press Enter key with blank input.
-
Enter the number corresponding to the DBMS to use.
Here, enter "3" and press Enter key.
-
Enter the port number to use.
If using the DBMS default port number, press Enter key with blank input.
-
Enter the value to set in Server of the connection string.
If "localhost", press Enter key with blank input.
-
Enter the value to set in UID of SaConnectionString.
If "root", press Enter key with blank input.
-
Enter the value to set in PWD of SaConnectionString.
※Passwords are displayed masked.
-
Enter the value to set in PWD of OwnerConnectionString.
※Passwords are displayed masked.
-
Enter the value to set in PWD of UserConnectionString.
※Passwords are displayed masked.
-
Enter the value to set in MySqlConnectingHost. If there are no specific requirements, enter "%"; if implementing access restrictions to MySQL, refer to "Rds.json" and configure accordingly.
If "%", press Enter key with blank input.
When installing Ver.1.4.17.1 or earlier, press Enter key with blank input.
-
Enter the "Default Language".
Enter the number corresponding to the language.
-
Enter the "Default Time Zone".
Enter the number corresponding to the time zone.
※If you enter "3", enter a time zone that can be used by the OS you are using.
-
A summary screen is displayed.
If the entered values are correct, enter y after "Shall I install Pleasanter with this content? Please enter 'y(yes)' or 'n(no)'. : " and press Enter to execute.
※Passwords are masked.
――― Summary ――― Install Directory : /web/pleasanter DBMS : MySQL SaConnectionString PWD : *** OwnerConnectionString PWD : *** UserConnectionString PWD : *** Port : 3306 Server : localhost Service Name : Implem.Pleasanter MySqlConnectingHost : % DefaultLanguage : ja DefaultTimeZone : Asia/Tokyo [Issues] Class : Num : Date : Description : Check : Attachments : [Results] Class : Num : Date : Description : Check : Attachments : ――――――――― Shall I install Pleasanter with this content? Please enter 'y(yes)' or 'n(no)'.: -
When "Type "y" (yes) if the license is correct, otherwise type "n" (no)." is displayed, enter y and execute.
When the following log is displayed, setup is complete.
-
When setup is complete, a web browser will launch and display the Enterprise Edition trial information page.
2. Pleasanter Startup Verification
-
Execute the following command to start Pleasanter with the predetermined user.
-
While running, execute the following command in another terminal to verify that Pleasanter is running. Exit with "Ctrl+C".
- Execution command
- Execution result
*   Trying ::1:5000...
* Connected to localhost (::1) port 5000 (#0)
> GET / HTTP/1.1
> Host: localhost:5000
> User-Agent: curl/7.76.1
> Accept: */*
>
* Mark bundle as not supporting multiuse
< HTTP/1.1 302 Found
< Content-Length: 0
< Date: Tue, 25 Jul 2023 02:42:19 GMT
< Server: Kestrel
< Location: http://localhost:5000/users/login?ReturnUrl=%2F
< X-Frame-Options: SAMEORIGIN
< X-XSS-Protection: 1; mode=block
< X-Content-Type-Options: nosniff
<
* Connection #0 to host localhost left intact
3. Pleasanter Service Script Creation
Create /etc/systemd/system/pleasanter.service with the following content. Specify the predetermined user who will start Pleasanter in User below.
[Unit]
Description = Pleasanter
Documentation =
Wants=network.target
After=network.target

[Service]
ExecStart = /usr/local/bin/dotnet Implem.Pleasanter.dll
WorkingDirectory = /web/pleasanter/Implem.Pleasanter
Restart = always
RestartSec = 10
KillSignal=SIGINT
SyslogIdentifier=dotnet-pleasanter
User = <User who will start Pleasanter>
Group = root
Environment=ASPNETCORE_ENVIRONMENT=Production
Environment=DOTNET_PRINT_TELEMETRY_MESSAGE=false

[Install]
WantedBy = multi-user.target
4. Service Registration and Service Startup
Execute the following commands to start the Pleasanter service and enable automatic service startup.
5. Reverse Proxy (nginx) Setup
Configure the reverse proxy to enable access via Port 80, the same as a normal web server.
1. SELinux Configuration Change
Execute the following command:
a. If any of "Command 'getenforce' not found.", "Permissive", or "Disabled" is displayed
Proceed to "2. nginx Installation".
b. If "Enforcing" is displayed
Execute the following command:
※By changing the above boolean value in SELinux, all network connections via scripts and modules on the relevant server will be permitted.
2. nginx Installation
Execute the following commands to install nginx.
3. Reverse Proxy Configuration
-
Create /etc/nginx/conf.d/pleasanter.conf with the following content. Specify the hostname or IP address of the server you will actually access in the server_name line.
server {
    listen  80;
    server_name   192.168.1.100;
    client_max_body_size 100M;
    location / {
       proxy_pass         http://localhost:5000;
       proxy_http_version 1.1;
       proxy_set_header   Upgrade $http_upgrade;
       proxy_set_header   Connection keep-alive;
       proxy_set_header   Host $host;
       proxy_cache_bypass $http_upgrade;
       proxy_set_header   X-Forwarded-For $proxy_add_x_forwarded_for;
       proxy_set_header   X-Forwarded-Proto $scheme;
    }
}
2. After creating the file, execute the following command to restart the service.
4. Http(80) Access Permission
Execute the following commands to configure Http (port:80) access permission to allow clients to access the web service.
6. Pleasanter Operation Verification
-
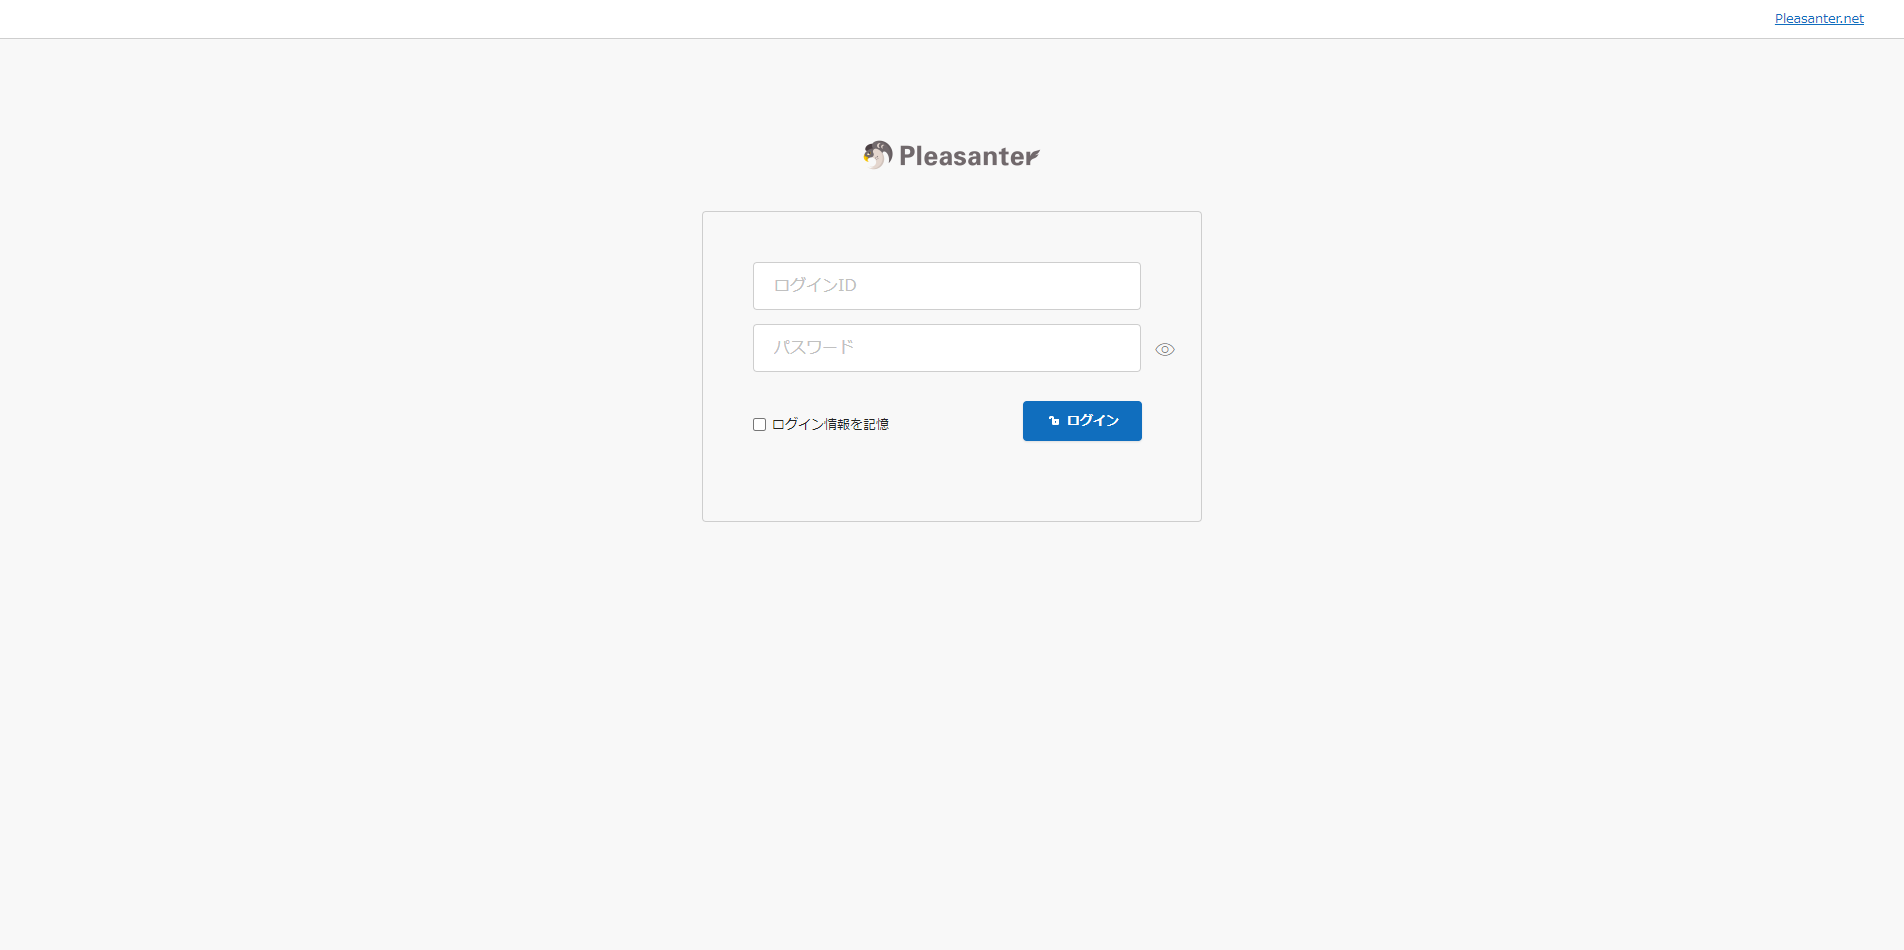
After starting Pleasanter, enter "Login ID: Administrator" and "Initial Password: pleasanter" on the Pleasanter login screen, then click the "Login" button.
-
After logging in, you will be prompted to change the password for the "Administrator" user, so enter an arbitrary password and click the "Change" button.

If Not Redirected Correctly
Please verify that the nginx configuration is correct. Small differences such as the presence or absence of / in the description can change the behavior.
If Pleasanter Screen Does Not Open
If the above steps completed without errors but accessing via browser displays a page such as "Welcome to nginx!" (not an error display), it is possible that the browser's security settings are preventing navigation to the Pleasanter login screen.
Please check your browser's security settings.
Supported Versions
| Supported Version | Content |
|---|---|
| 1.4.9.0 and later | Compatible with MySQL |
| 1.4.10.0 and later | Resolved issue where MySQL access control functionality may reject Owner and User connections ※Added link to "Configure the Web Server and DB Server to Use MySQL Separately" in notes |
| 1.4.18.0 and later | Added functionality to specify connection source hosts other than localhost (same server as DB) for MySQL DB |
| 1.5.0.0 and later | Compatible with .NET 10, PostgreSQL 18 |
Related Information
FAQ: I want to install Pleasanter 1.3.43.0 or earlier in a Linux environment