Migration Procedure from .netFramework Version of Pleasanter Installed on Windows/Windows Server to Pleasanter 1.5
Overview
This is the procedure for migrating a Windows Server installed Pleasanter to Pleasanter 1.5.
| Target | Before migration | After migration |
|---|---|---|
| OS | Windows/Windows Server | Windows/Windows Server |
| DB | SQL Server | SQL Server |
| Web Server | IIS | IIS |
| Platform | .net Framework4.7/4.8 | .NET 10.0 |
| Pleasanter | Pleasanter 0.50 or earlier | Pleasanter 1.5 |
Cautions
- Before carrying out this procedure, please make a backup of the system and database.
- If you have edited the configuration file of the source environment (under the C:\inetpub\wwwroot\pleasanter\App_Data\Parameters folder), do not overwrite it to the destination environment. If you overwrite it as is, it is possible that the newly added parameters are lost, so please use a diff tool such as WinMerge to merge only the changes into the new parameter file. WinMerge is used in this procedure.
Pre-installation Checklist
Confirm the version of Pleasanter installed on Windows/Windows Server.
- Log in to Pleasanter.
- Click "Help" in the upper right corner and select "Version".
- Confirm that the version is "0.50.x.x (or 0.49.x.x)".
Preparations
Tools to Use
- WinMerge must be installed. It can be downloaded from the following page.
https://winmerge.org/downloads/?lang=en
Backup Database
-
Open the "Tools (T)" menu in "Server Manager" and start "Internet Information Services (IIS) Manager".
-
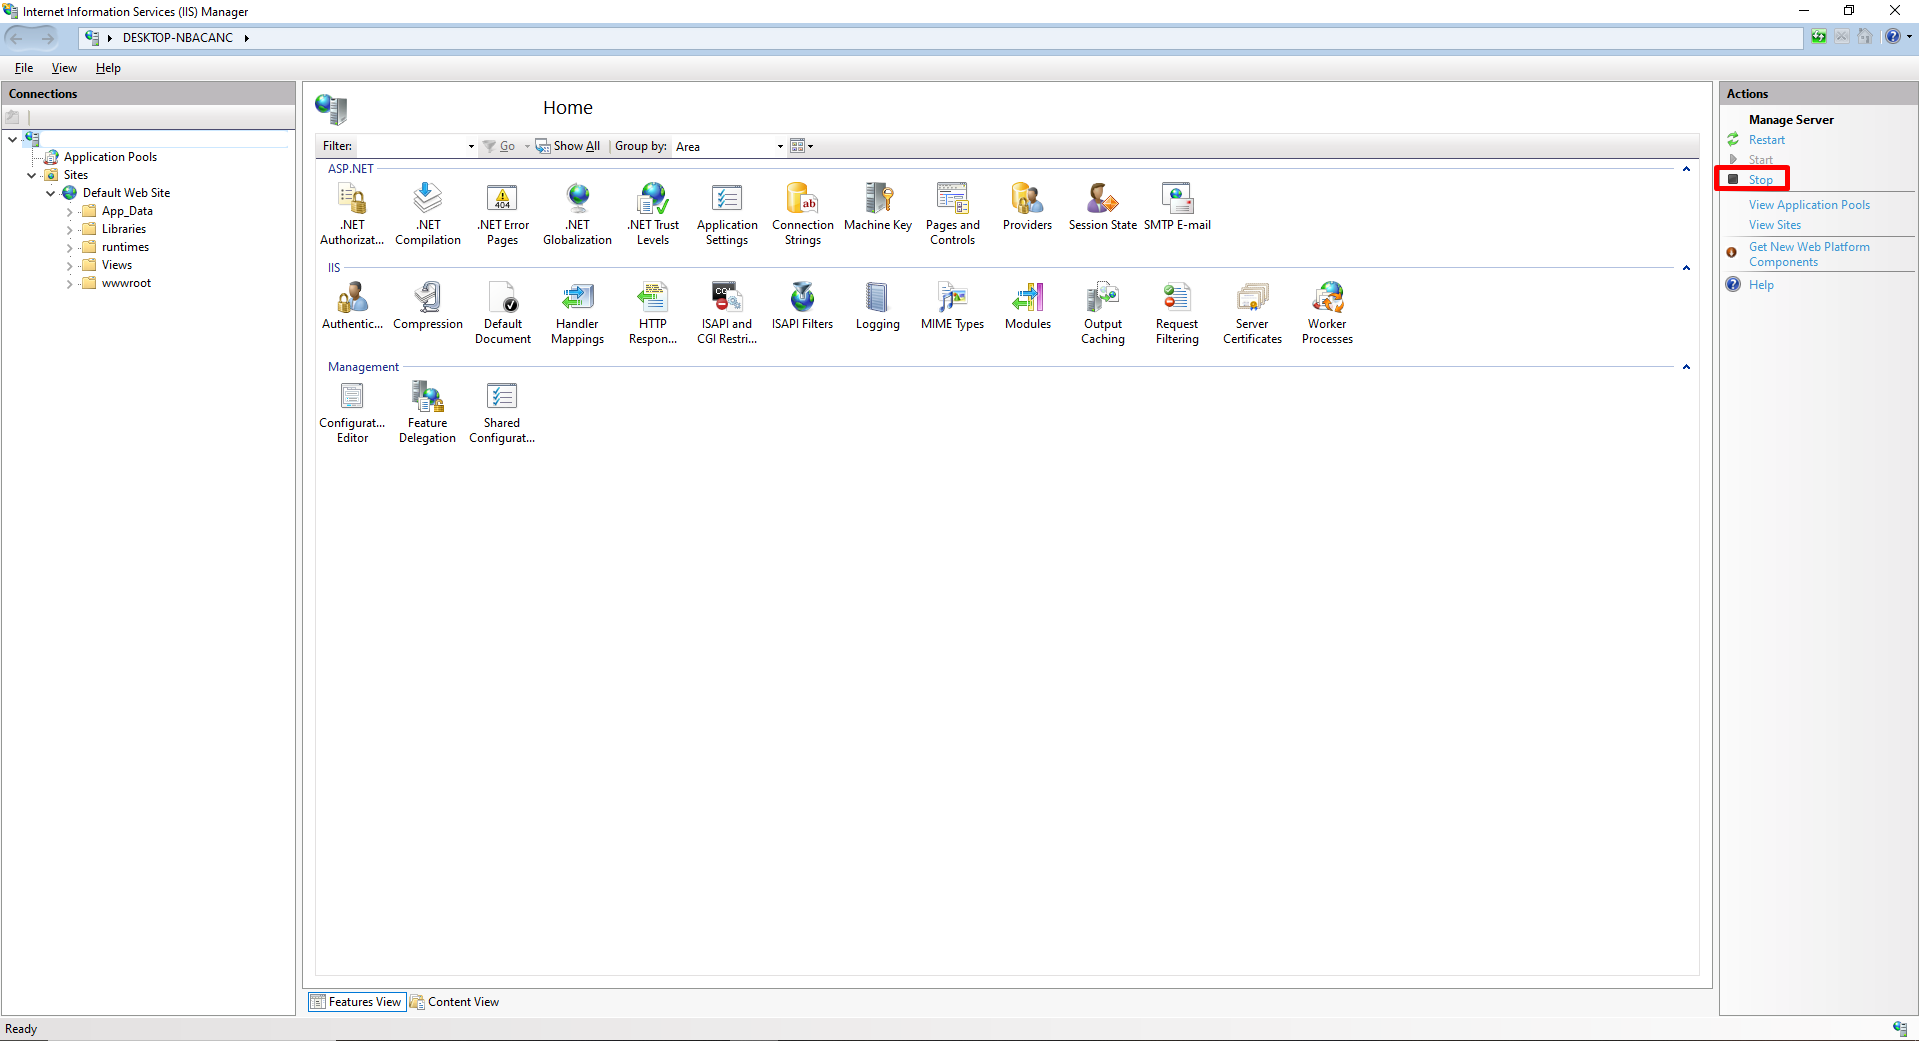
Select the server name in the left pane, click "Stop" in the right pane, and stop IIS.
-
Back up the Pleasanter database.
FAQ: I want to backup Pleasanter's DB data regularly (SQL Server)
Download Pleasanter 1.5
-
Access the following URL:
https://pleasanter.org/dlcenter -
Download Pleasanter from the "Pleasanter 1.5 Community Edition" link.
Deploy Modules
-
Extract the downloaded Pleasanter module to the "C:\web" folder.
-
Start WinMerge and compare the following two folders.
①C:\web\pleasanter\Implem.Pleasanter\App_Data\Parameters
②C:\inetpub\wwwroot\pleasanter\App_Data\Parameters

- Compare and modify each parameter file in folder ① above with the corresponding files in folder ② above.
*If you are not using extended features, there is no need to change the JSON files inside folders such as "Extended○○".
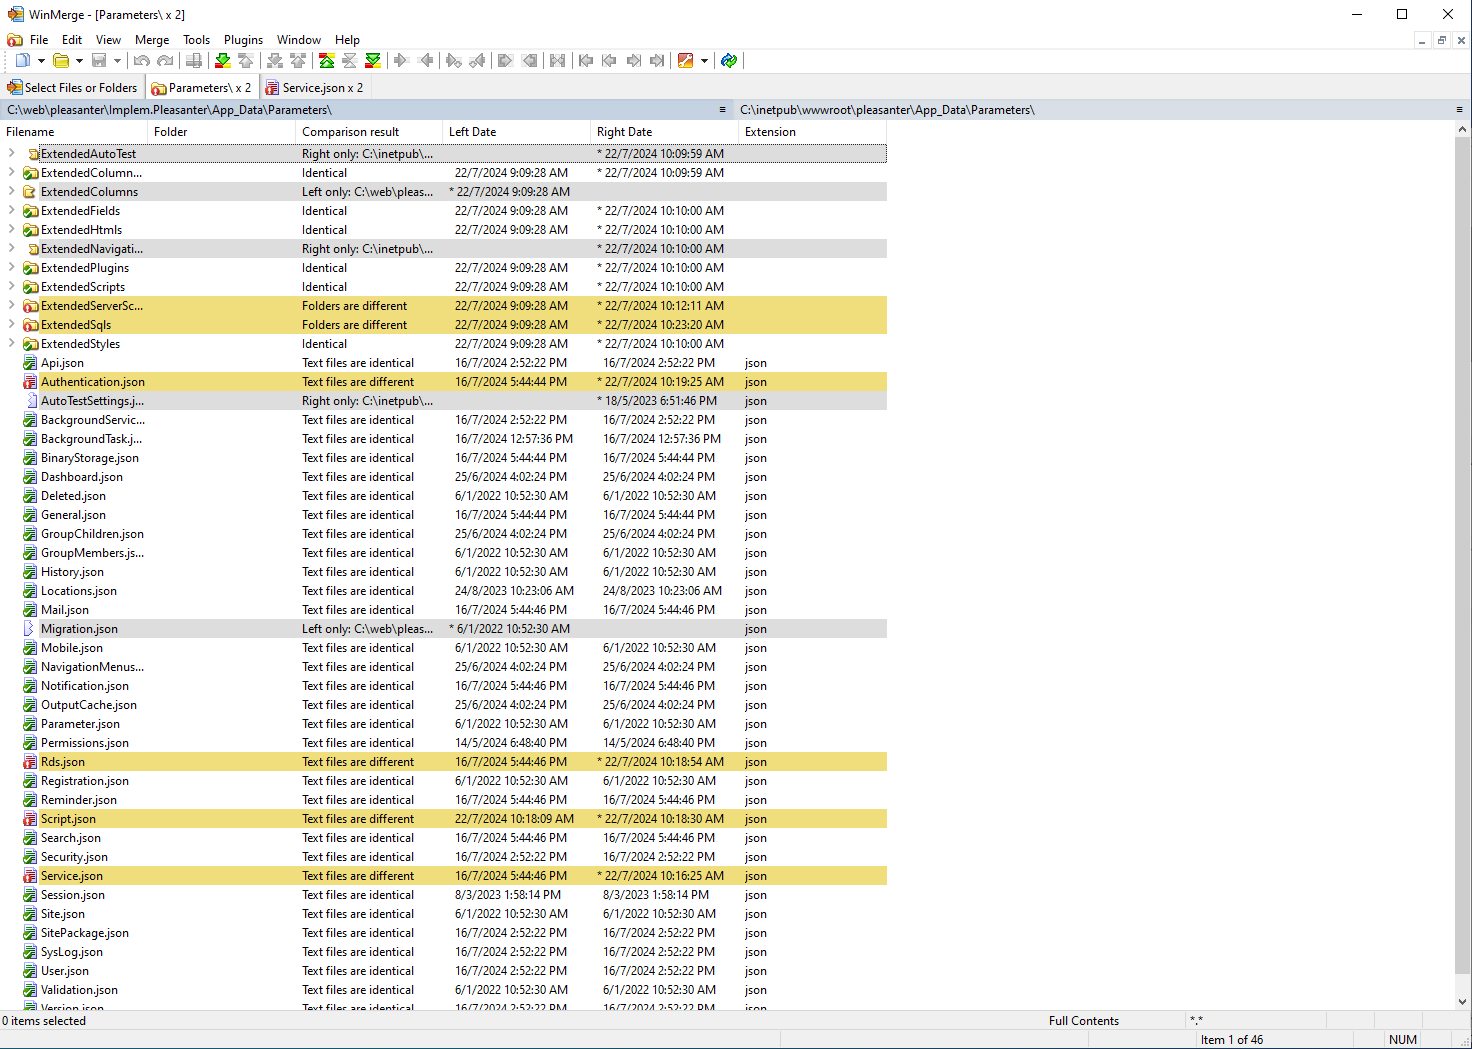
When modifying parameters, the following parameters must be modified to match the source environment. Set Dbms to "SQLServer" and TimeZone to "UTC".
Rds.json
Service.json
Execute CodeDefiner
- Start a command prompt and run the following command.
Start Pleasanter
-
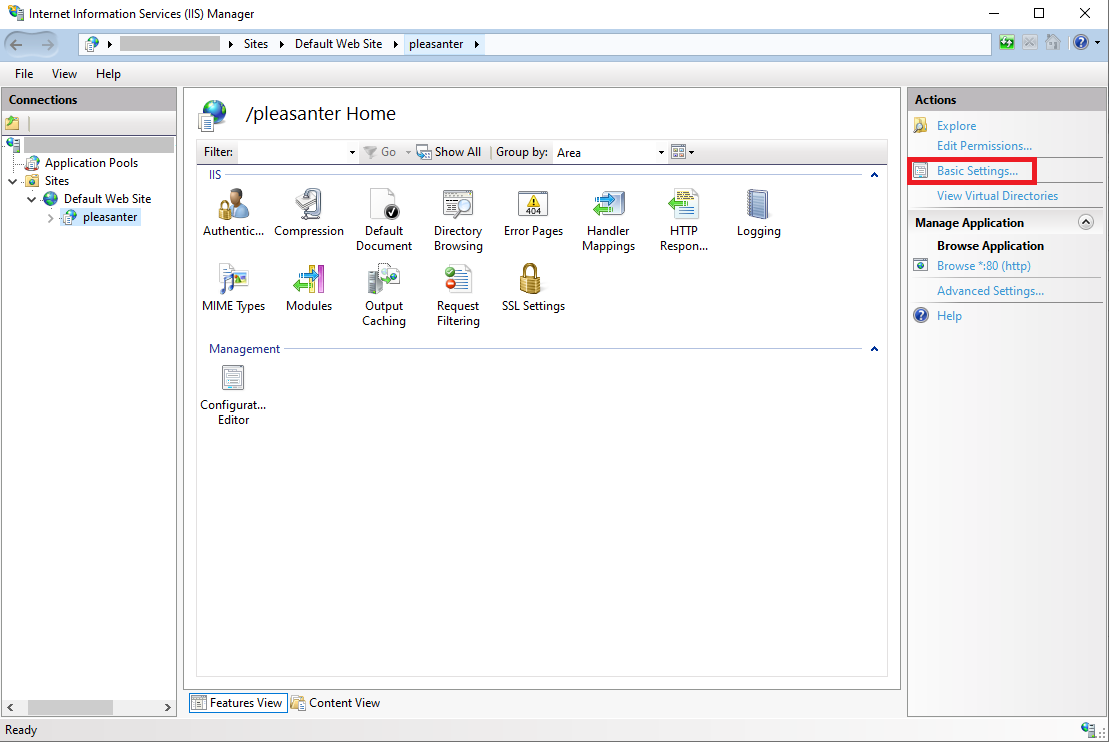
Start IIS Manager, select the virtual directory of Pleasanter before migration from the left pane (by default, Server Name > Site > Default Web Site > Pleasanter), and click "Basic Settings" in the right pane.
-
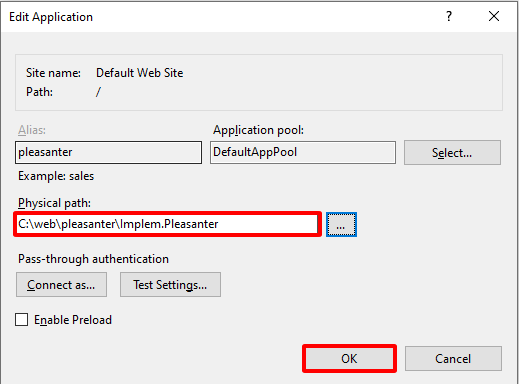
Edit the physical path to "C:\web\pleasanter\Implem.Pleasanter" and click "OK".
-
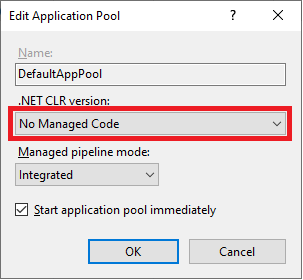
In the left pane, select the server name > Application Pool, then select "Default App Pool" in the center pane, and click "Basic Settings" on the right pane.

-
Select "No Managed Code" for ".Net CLR Version" and click "OK".
-
Start IIS Manager and IIS.

-
Start a browser and make sure you can log in to Pleasanter.