Migration Procedure from Previous Pleasanter (.NET Core version) Built on CentOS to Pleasanter 1.3 or Later
Overview
This description is the procedure for migrating .NET Core version of Pleasanter installed on CentOS to Pleasanter 1.3.
| Target | Before migration | After migration |
|---|---|---|
| OS | CentOS | CentOS |
| DB | PostgreSQL | PostgreSQL |
| Web server | Nginx | Nginx |
| Platform | .NET Core | .NET 6.0 |
| Pleasanter | .NET Core version (1.1.x.x) | Pleasanter 1.3 (1.3.x.x) |
Prerequisites
Make sure that Pleasanter installed on CentOS is the .NET Core version.
1. Log in to Pleasanter.
-
Click "Help" in the upper right corner and select "Version".
-
Confirm that the version is "1.1.x.x".
Cautions
- If you have edited the configuration file of the source environment (under the /web/pleasanter/Implem.Pleasanter/App_Data/Parameters directory), do not overwrite it to the destination environment. If you overwrite it as is, it is possible that the newly added parameters are lost, so please use a diff tool such as WinMerge to merge only the changes into the new parameter file. WinMerge is used in this procedure.
Preparations
Tools to Use
- WinSCP and WinMerge are installed on the local PC (Windows).
WinSCP: https://forest.watch.impress.co.jp/library/software/winscp/
WinMerge: https://winmergejp.bitbucket.io/
Backup Database
-
Log in to the server where Pleasanter is installed (hereafter, remote PC) and stop Pleasanter with the following command:
-
Backup of the Pleasanter database.
FAQ: PostgreSQL database backup and restore procedure
Install .NET6.0
- Log in to the remote PC and execute the following commands:
- Confirm that it is installed with the following command:
Download Pleasanter 1.3
-
Start a browser and access the following URL:
https://pleasanter.org/dlcenter -
Click "Pleasanter 1.3" under "Pleasanter 1.3 Community Edition" and download the file.
Deploy Modules
-
Start WinSCP on the local PC and connect to the remote PC.
-
Create a working folder (C:\migration) and a backup folder (C:\migration\backup) on the local PC.
-
Use WinSCP to navigate to the "/web" directory on the remote PC.
-
Back up the "/web/pleasanter" directory on the remote PC to "C:\migration\backup" on the local PC.

-
Delete the "/web/pleasanter" directory on the remote PC.
-
Extract the downloaded file to the working folder on the local PC.
-
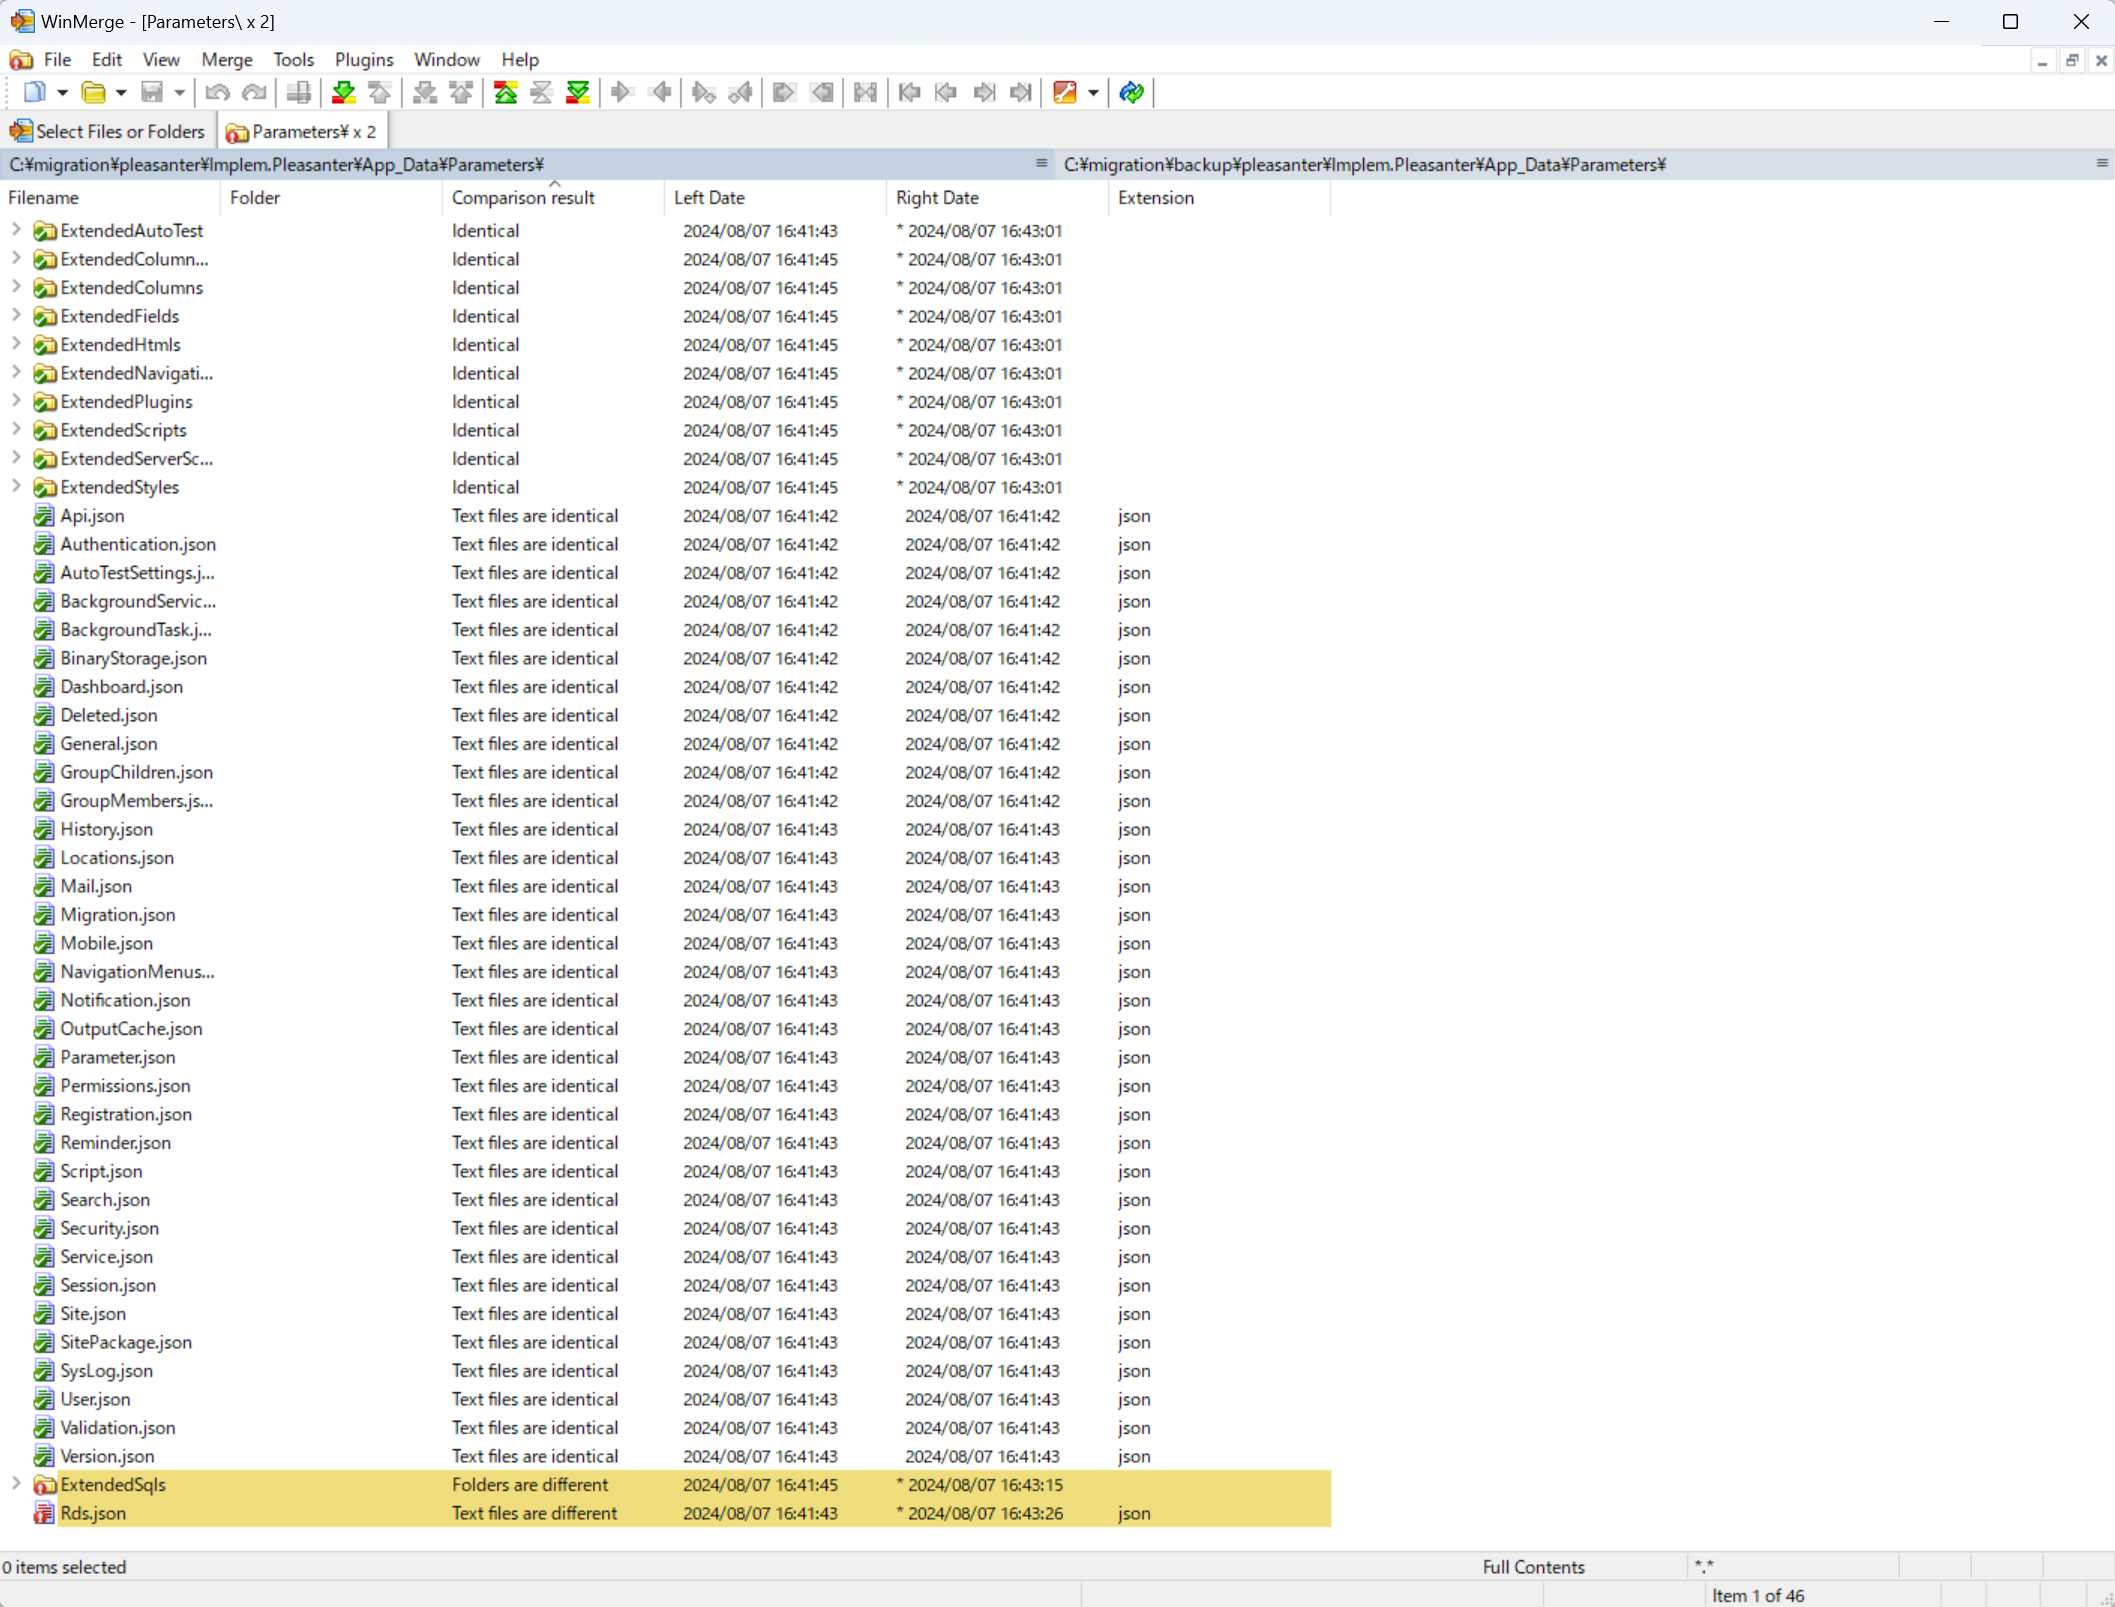
Start WinMerge and compare the following two folders.
①C:\migration\pleasanter\Implem.Pleasanter\App_Data\Parameters
②C:\migration\backup\pleasanter\Implem.Pleasanter\App_Data\Parameters

-
Compare and modify each parameter file in folder ① above with the corresponding files in folder ② above.
- Use WinSCP to copy the "C:\migration\pleasanter" folder on the local PC to the "/web" directory on the remote PC.

Start Pleasanter
-
Log in to the remote PC, start a terminal, and execute the following commands:
-
Start Pleasanter with the following command:
-
Start your browser and log in to Pleasanter.
-
Click "Help" in the upper right corner and select "Version".
-
Confirm that the version is "1.3.xx."
Other
Restore Database
If you need to restore the database, please refer to the following page:
FAQ: PostgreSQL database backup and restore procedure