Upgrade Procedure for Version 1.4.8.0 or Later (Azure App Service)
Overview
This is the upgrade procedure for Pleasanter version 1.4.8.0 onwards, running on Azure App Service.
Cautions
- Please do not overwrite the existing parameter file with the latest version. Any parameters added in the latest version may be lost, and Pleasanter might fail to start.
- If you have upgraded to the Enterprise Edition and have extended the columns, please follow the "Version Upgrade Procedure for Enterprise Edition Upgraded Pleasanter" under "Content for Support Contract Holders" for the upgrade procedure.
1.Please do not set the /l or /z parameters when running CodeDefiner.
Limitations
- The merge function of CodeDefiner is available from version 1.4.8.0 onwards.
- The merge function of CodeDefiner applies the parameters that were added and removed in the new version.
- The upgrade target applies from version 1.4.0.0 onwards.
Operation Procedure
The upgrade procedure is as follows:
1. Stop the Pleasanter application
1. Backup the database
1. Backup Pleasanter
1. Prepare Pleasanter
1. Prepare the application
1. Download the patch file
1. Reconfigure parameters
1. Deploy the application
1. Run CodeDefiner
1. Confirm that Pleasanter has started successfully
1. Stop Pleasanter
- Connect to the Azure Portal
- Open App Service.
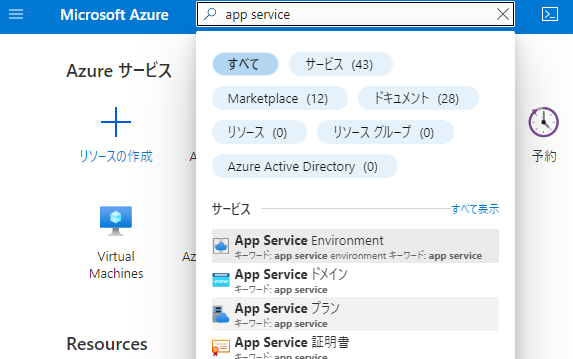
- Select the already created App Service instance.
- Stop the App Service
2. Database Backup
Back up the database. Be sure to back up if you upgrade to Enterprise Edition and extend the columns.
Pleasanter User Manual - FAQ: Backup and Restore
3. Pleasanter Backup
- Create the folder(C:\web\pleasanter_bk)on the local environment.
- Access Kudu
- Click "Advanced Tools" from "Development Tools" in the left menu of App Service.
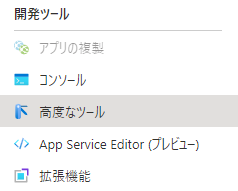
- Click the "Move" link.

- Click "Debug console" > "CMD" from the Kudu header menu.

- Click "Site" from the directory list. After selecting, verify that the prompt changes to C:\home\site.
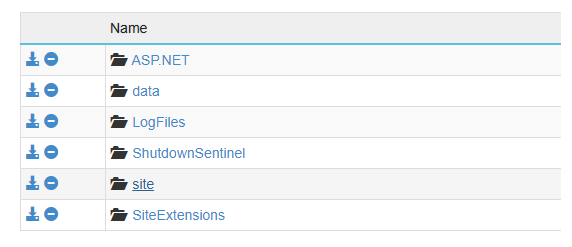
- Download C:\home\site\wwwroot from Kudu, then place and extract it under the folder created in step 3.1 in the local environment.
- Rename C:\web\pleasanter_bk\wwwroot to C:\web\pleasanter_bk\Implem.Pleasanter
Before Change)c:\web\pleasanter\wwwroot
After Change)c:\web\pleasanter\Implem.Pleasanter
4. Preparing Pleasanter
1. Preparing the application
- Download the latest version of Pleasanter from Download Center
- Extract the downloaded zip file and decompress it under the local environment's C:\web directory.
Make sure the structure under the *C:\web* directory is as follows.
C:\web\pleasanter
C:\web\pleasanter_bk
2. Download the patch file
- Download the ParametersPatch.zip file for the same version as the one you deployed from GitHub Release Notes
- Place the ParametersPatch.zip file under the C:\web\pleasanter directory.
C:\web\pleasanter\ParametersPatch.zip
*Do not extract the ParametersPatch.zip file, place it as is.
3. Reconfigure parameters
Navigate to the C:\web\pleasanter\Implem.CodeDefiner folder and execute the parameter merge process using CodeDefiner.
> cd C:\web\pleasanter\Implem.CodeDefiner
> dotnet Implem.CodeDefiner.dll merge /b C:\web\pleasanter_bk /i C:\web\pleasanter
*The parameter files set with the extensions under C:\web\pleasanter_bk\Implem.Pleasanter\App_Data\Parameters will also be applied to the new resources.
If you need to manually reconfigure the parameters.
Please refer to the FAQ:
4. Application Deployment
- Navigate to the [C:\web\pleasanter] folder containing the latest version of the local environment module reconfigured in step 4.3.
- Rename the folder "C:\web\pleasanter\Implem.Pleasanter" to "wwwroot"
Before renaming)c:\web\pleasanter\Implem.Pleasanter
After renaming)c:\web\pleasanter\wwwroot - Compress the [wwwroot] folder into a zip file name "wwwroot.zip"
- Rename the folder "C:\web\pleasanter\Implem.CodeDefiner" to "CodeDefiner"
Before renaming)c:\web\pleasanter\Implem.CodeDefiner
After renaming)c:\web\pleasanter\CodeDefiner - Compress the CodeDefiner folder into a zip file name "CodeDefiner.zip"
- Drag and drop wwwroot.zip and CodeDefiner.zip into the Size of Kudu, and verify that the files are extracted and stored successfully.
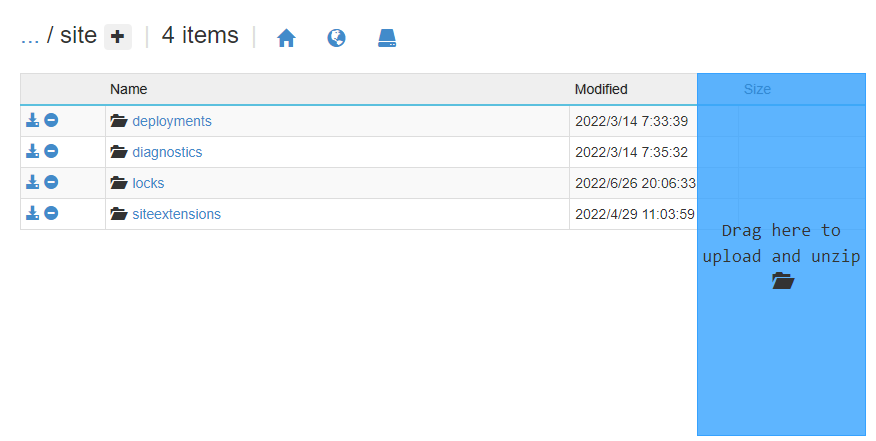
*For safety, it is recommended to rename the existing C:\home\site\wwwroot and C:\home\site\CodeDefiner folders to backup names like C:\home\site\wwwroot_bk and C:\home\site\CodeDefiner_bk before deploying the new version.
5. Executing CodeDefiner
- From the Kudu directory list, select CodeDefiner and confirm that the prompt shows [C:\home\site\CodeDefiner].
- Execute the following command to run CodeDefiner. The arguments /l and /z are not necessary.
You will be prompted to confirm execution. Enter "y" and press Enter to proceed. If you wish to cancel the execution, enter "n" and press Enter.
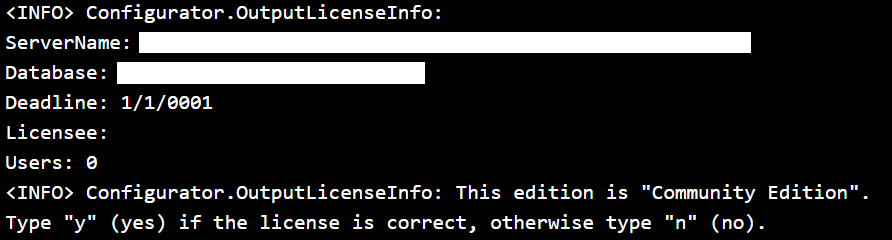
*The display of Licensee may be garbled depending on the environment.
6. Pleasanter Startup Confirmation
- Open App Service and start the instance.
- Open the Pleasanter login screen in the browser, log in, then click on "Help" - "Version" in the navigation menu and confirm that the version is correct.
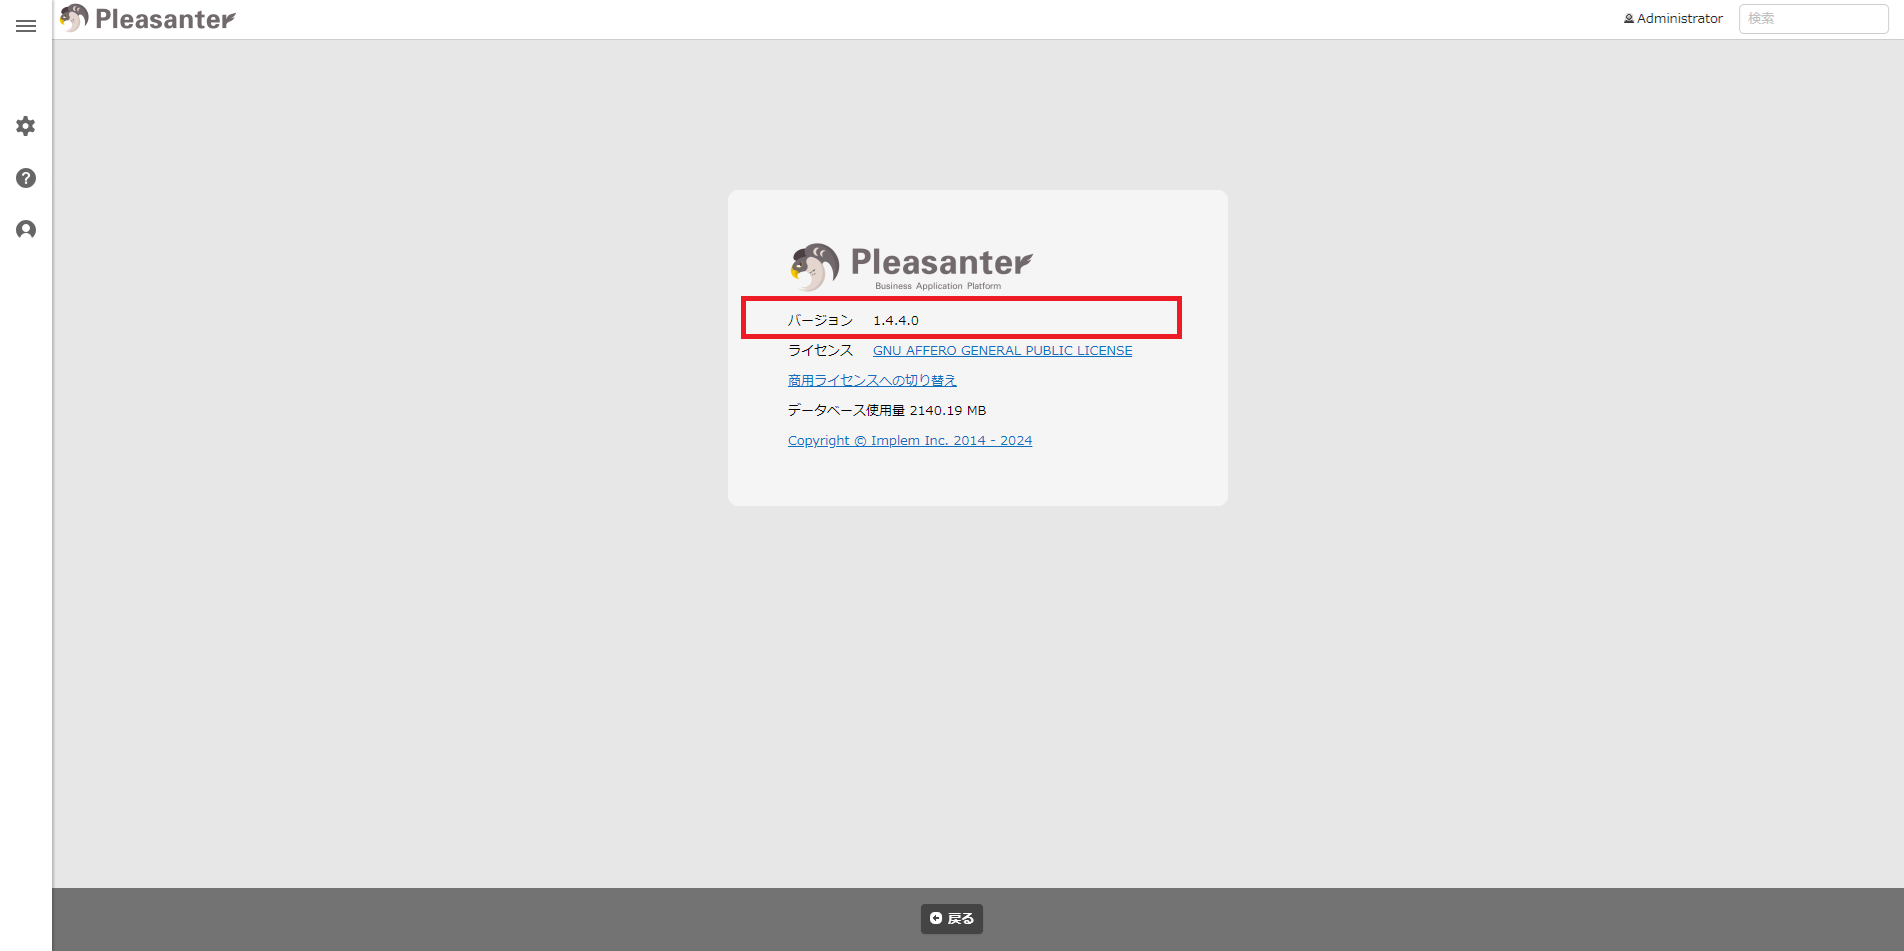
*If the backup folder [C:\web\pleasanter_bk] from step 3 is not needed, delete it. If you wish to keep it, move it to a different folder.
Supported Versions
| Supported Version | Body |
|---|---|
| 1.4.8.0 onwards | Added parameter merge procedure |
Related Information
FAQ: CodeDefiner stops working when automating setup
List of CodeDefiner Commands